In the world of calisthenics most static [still] and dynamic [movement] exercises require a tremendous amount of strength. The front lever is one of the most challenging and represents a measurable milestone along one’s calisthenics journey. The front lever is a move that requires herculean shoulder, lat, and core strength. Your height and weight are major contributing factors in your ability to naturally hold this static exercise. The taller you are, the harder the move will be – sorry tall folks!
When working your way up to the full front lever, there are a variety of progressions that can be done to build the necessary strength in order to advance. Our assisted bodyweight training resistance bands are a valuable tool to help accelerate your front lever progress. They add assistance so you can hold your front lever progressions longer and maximize your energy expenditure. This helps you stay on the bar longer and workout until absolute muscle fatigue. Imagine sitting on the bench press and racking the bar after six reps due to fatigue. Now imagine doing a burnout where you perform additional sets in rapid succession while constantly lower the weight so you continuously eke out more reps and fully drain the energy in your muscles. This concept of ‘progressive overload’ is often when major strides are made. This is the equivalent of using more and more assistance from our calisthenics workout bands on the bar as your muscles fatigue from holding the front lever.
We recommend finding which band works best for you as a starting point. If you can hold the lever for at least 30 seconds with the bands then it’s too easy and it’s time to use a thinner band. Over time you’ll develop the requisite strength needed to do your full front lever without any bands.
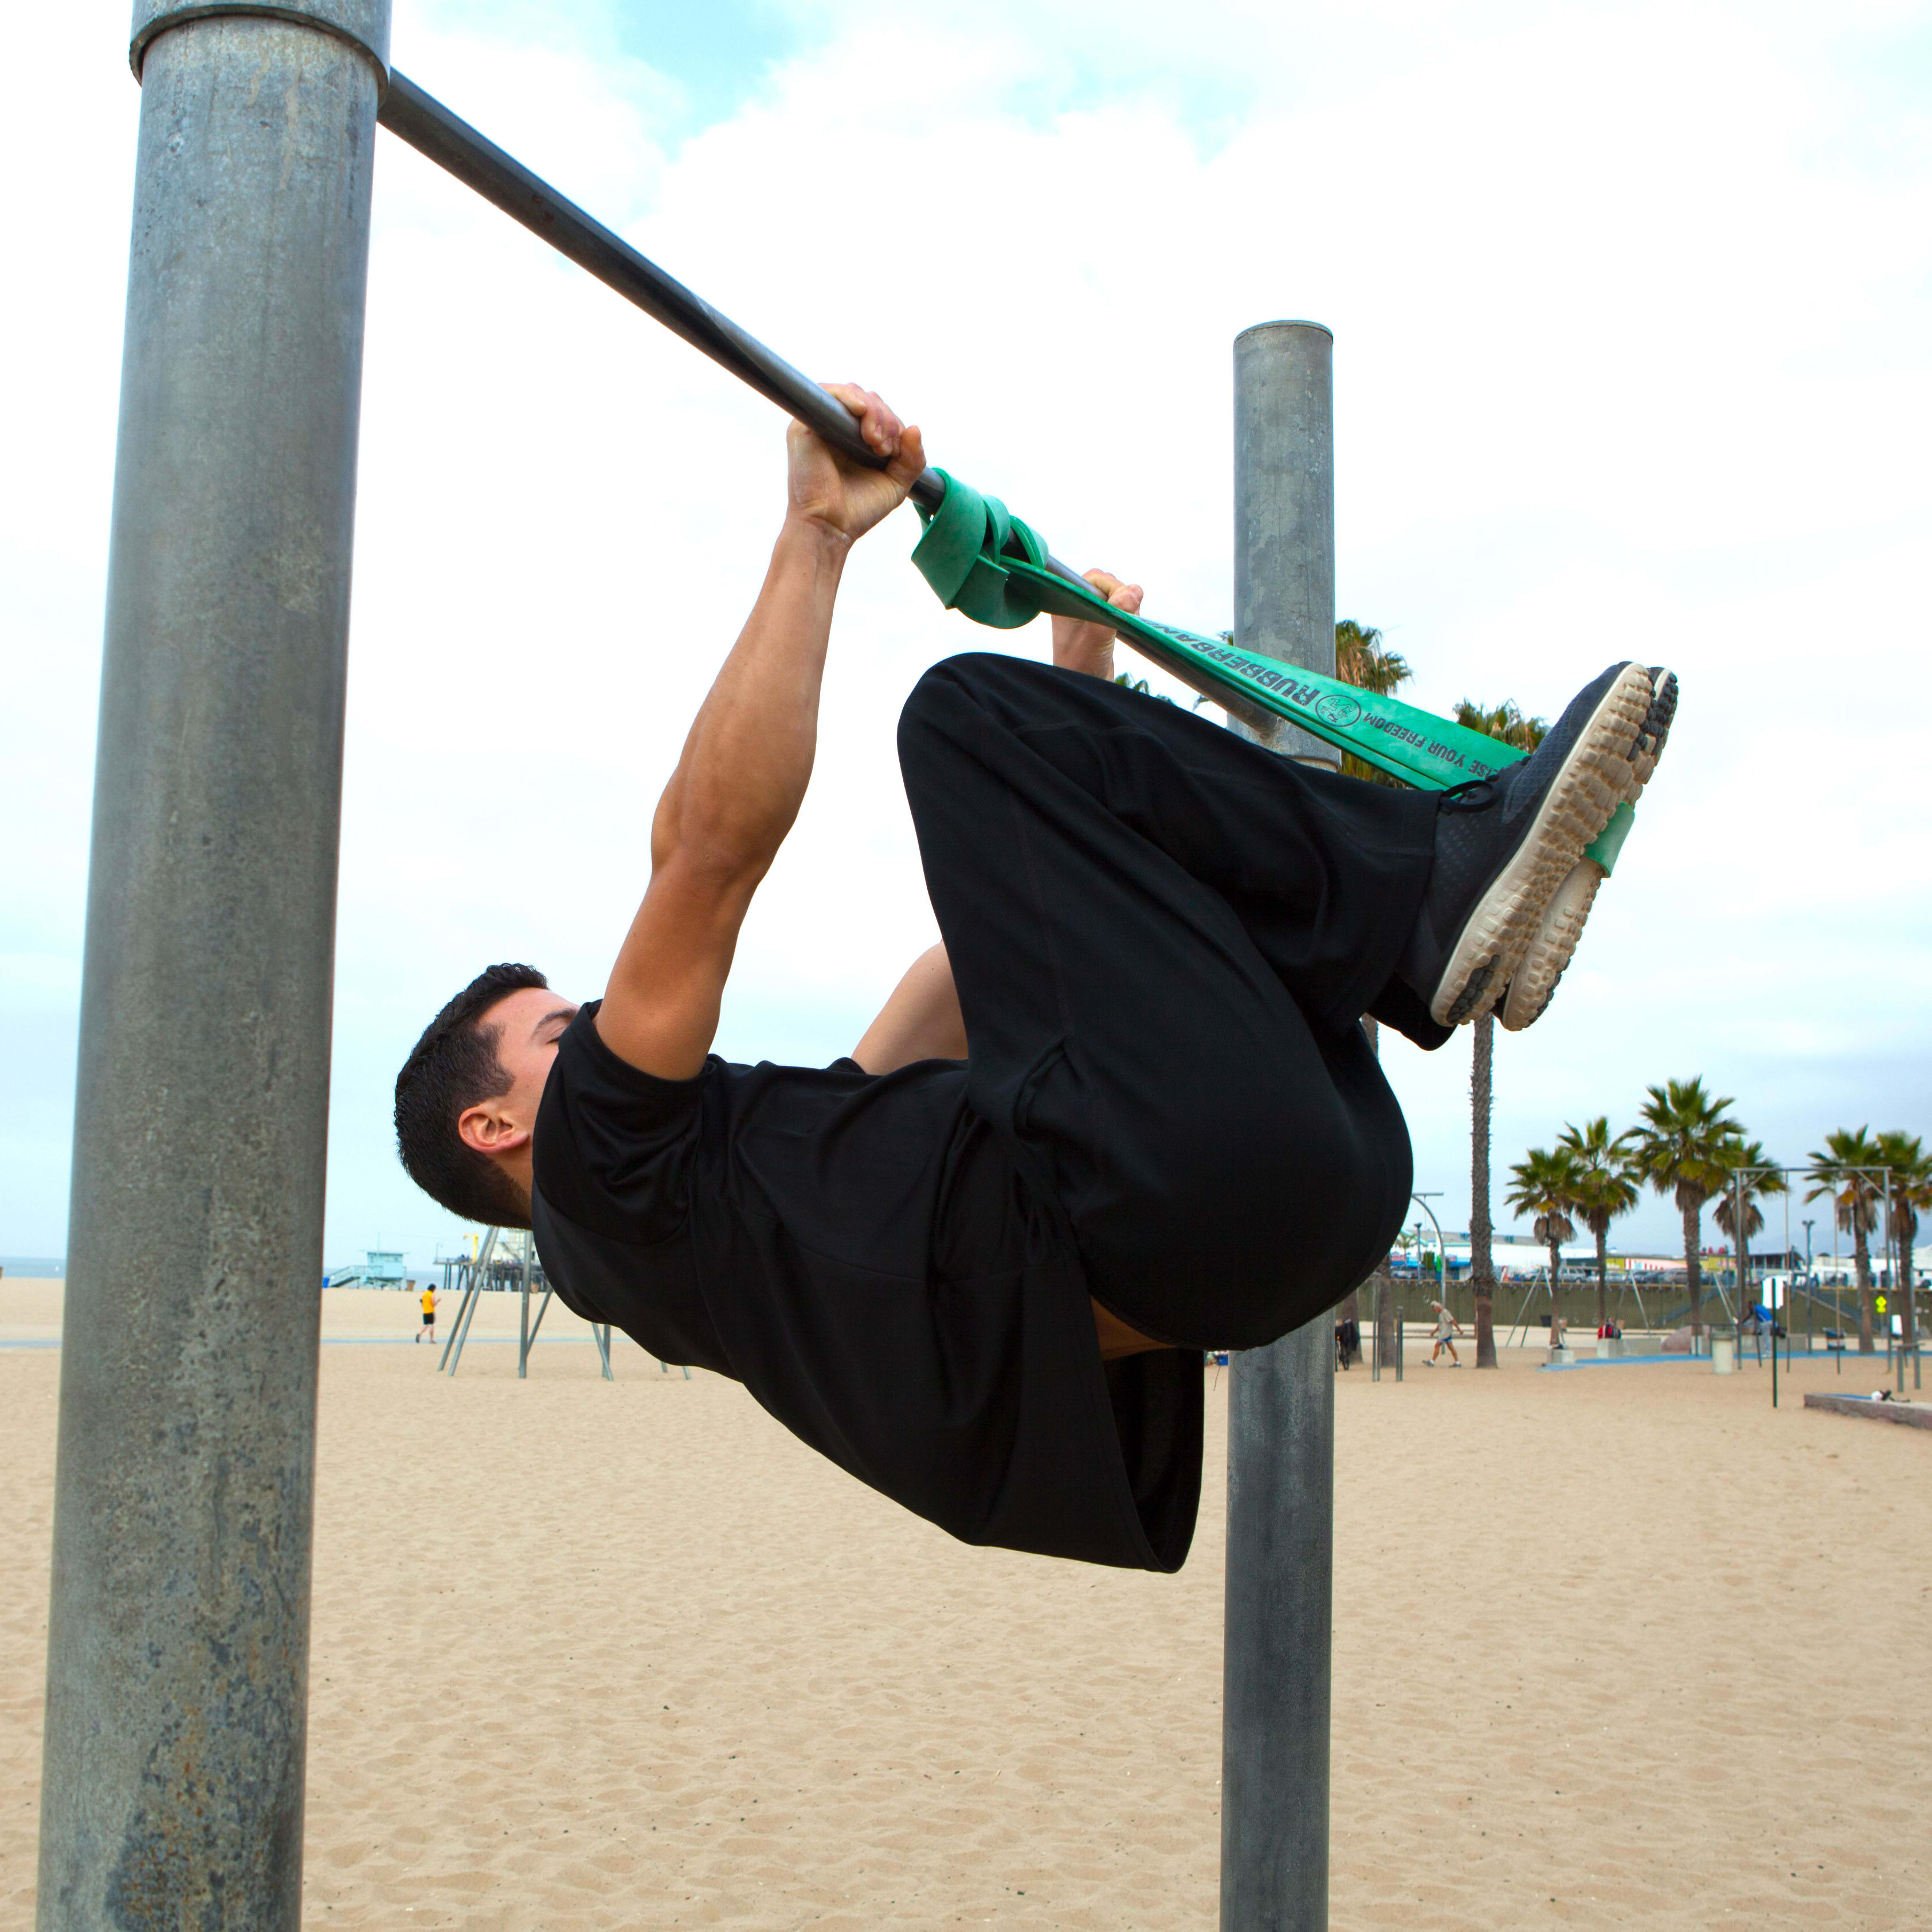
1.) The first progression is the Frog Tuck. For this, you’ll want to lean back while pulling your legs and hips up and drawing your knees to your chest. In the Frog Tuck your back is rounded and you want to feel like your body is curled up into a ball. Hold as long as you can and repeat this until you can hold yourself in this static position for 10-15 seconds.
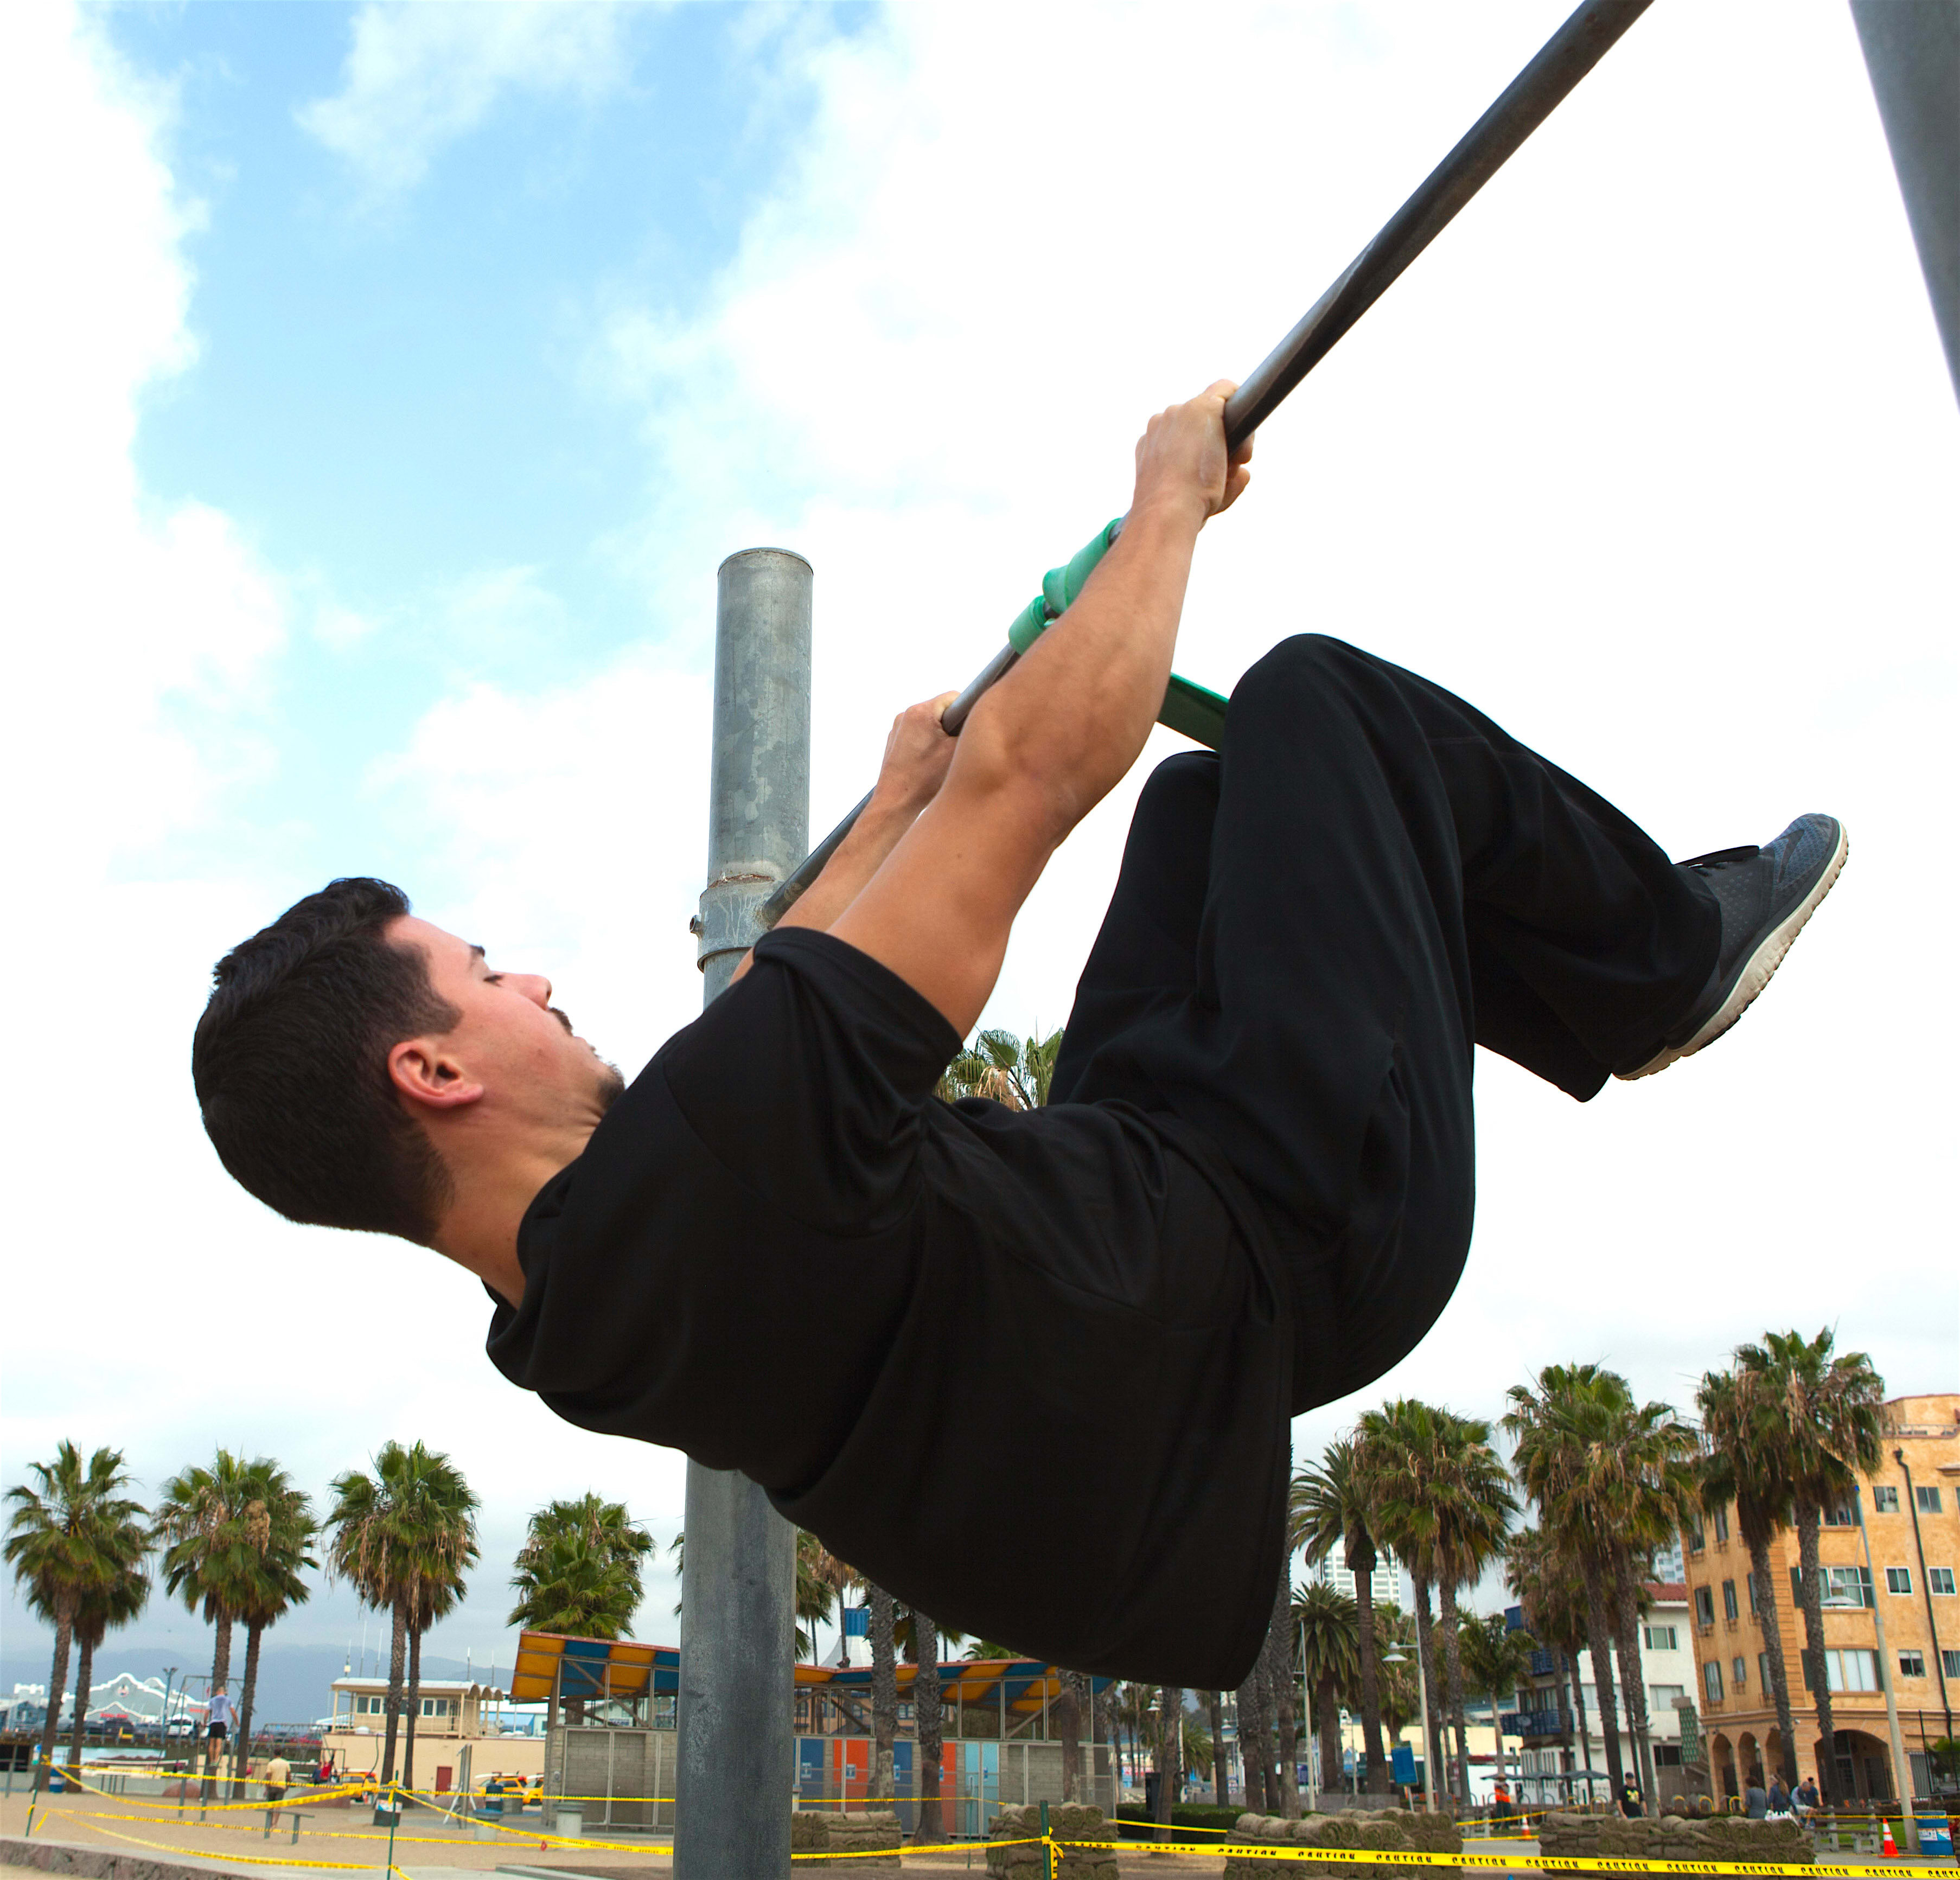
2.) Once you are able to hold the Frog Tuck for 10-15 seconds it’s time to advance to the Tuck Lever. The difference is that you are now straightening your back out from its rounded position so that it’s parallel to the ground – through your body remains ‘tucked’ with your knees drawn up. Your weight distribution will shift, and inevitably, you’ll notice that holding yourself up becomes more difficult. Stay at this progression until you can hold for 10-15 seconds. This next progression heavily engages your back and core so we recommend working in other exercises that build core strength – such as crunches or knees-to-chests.
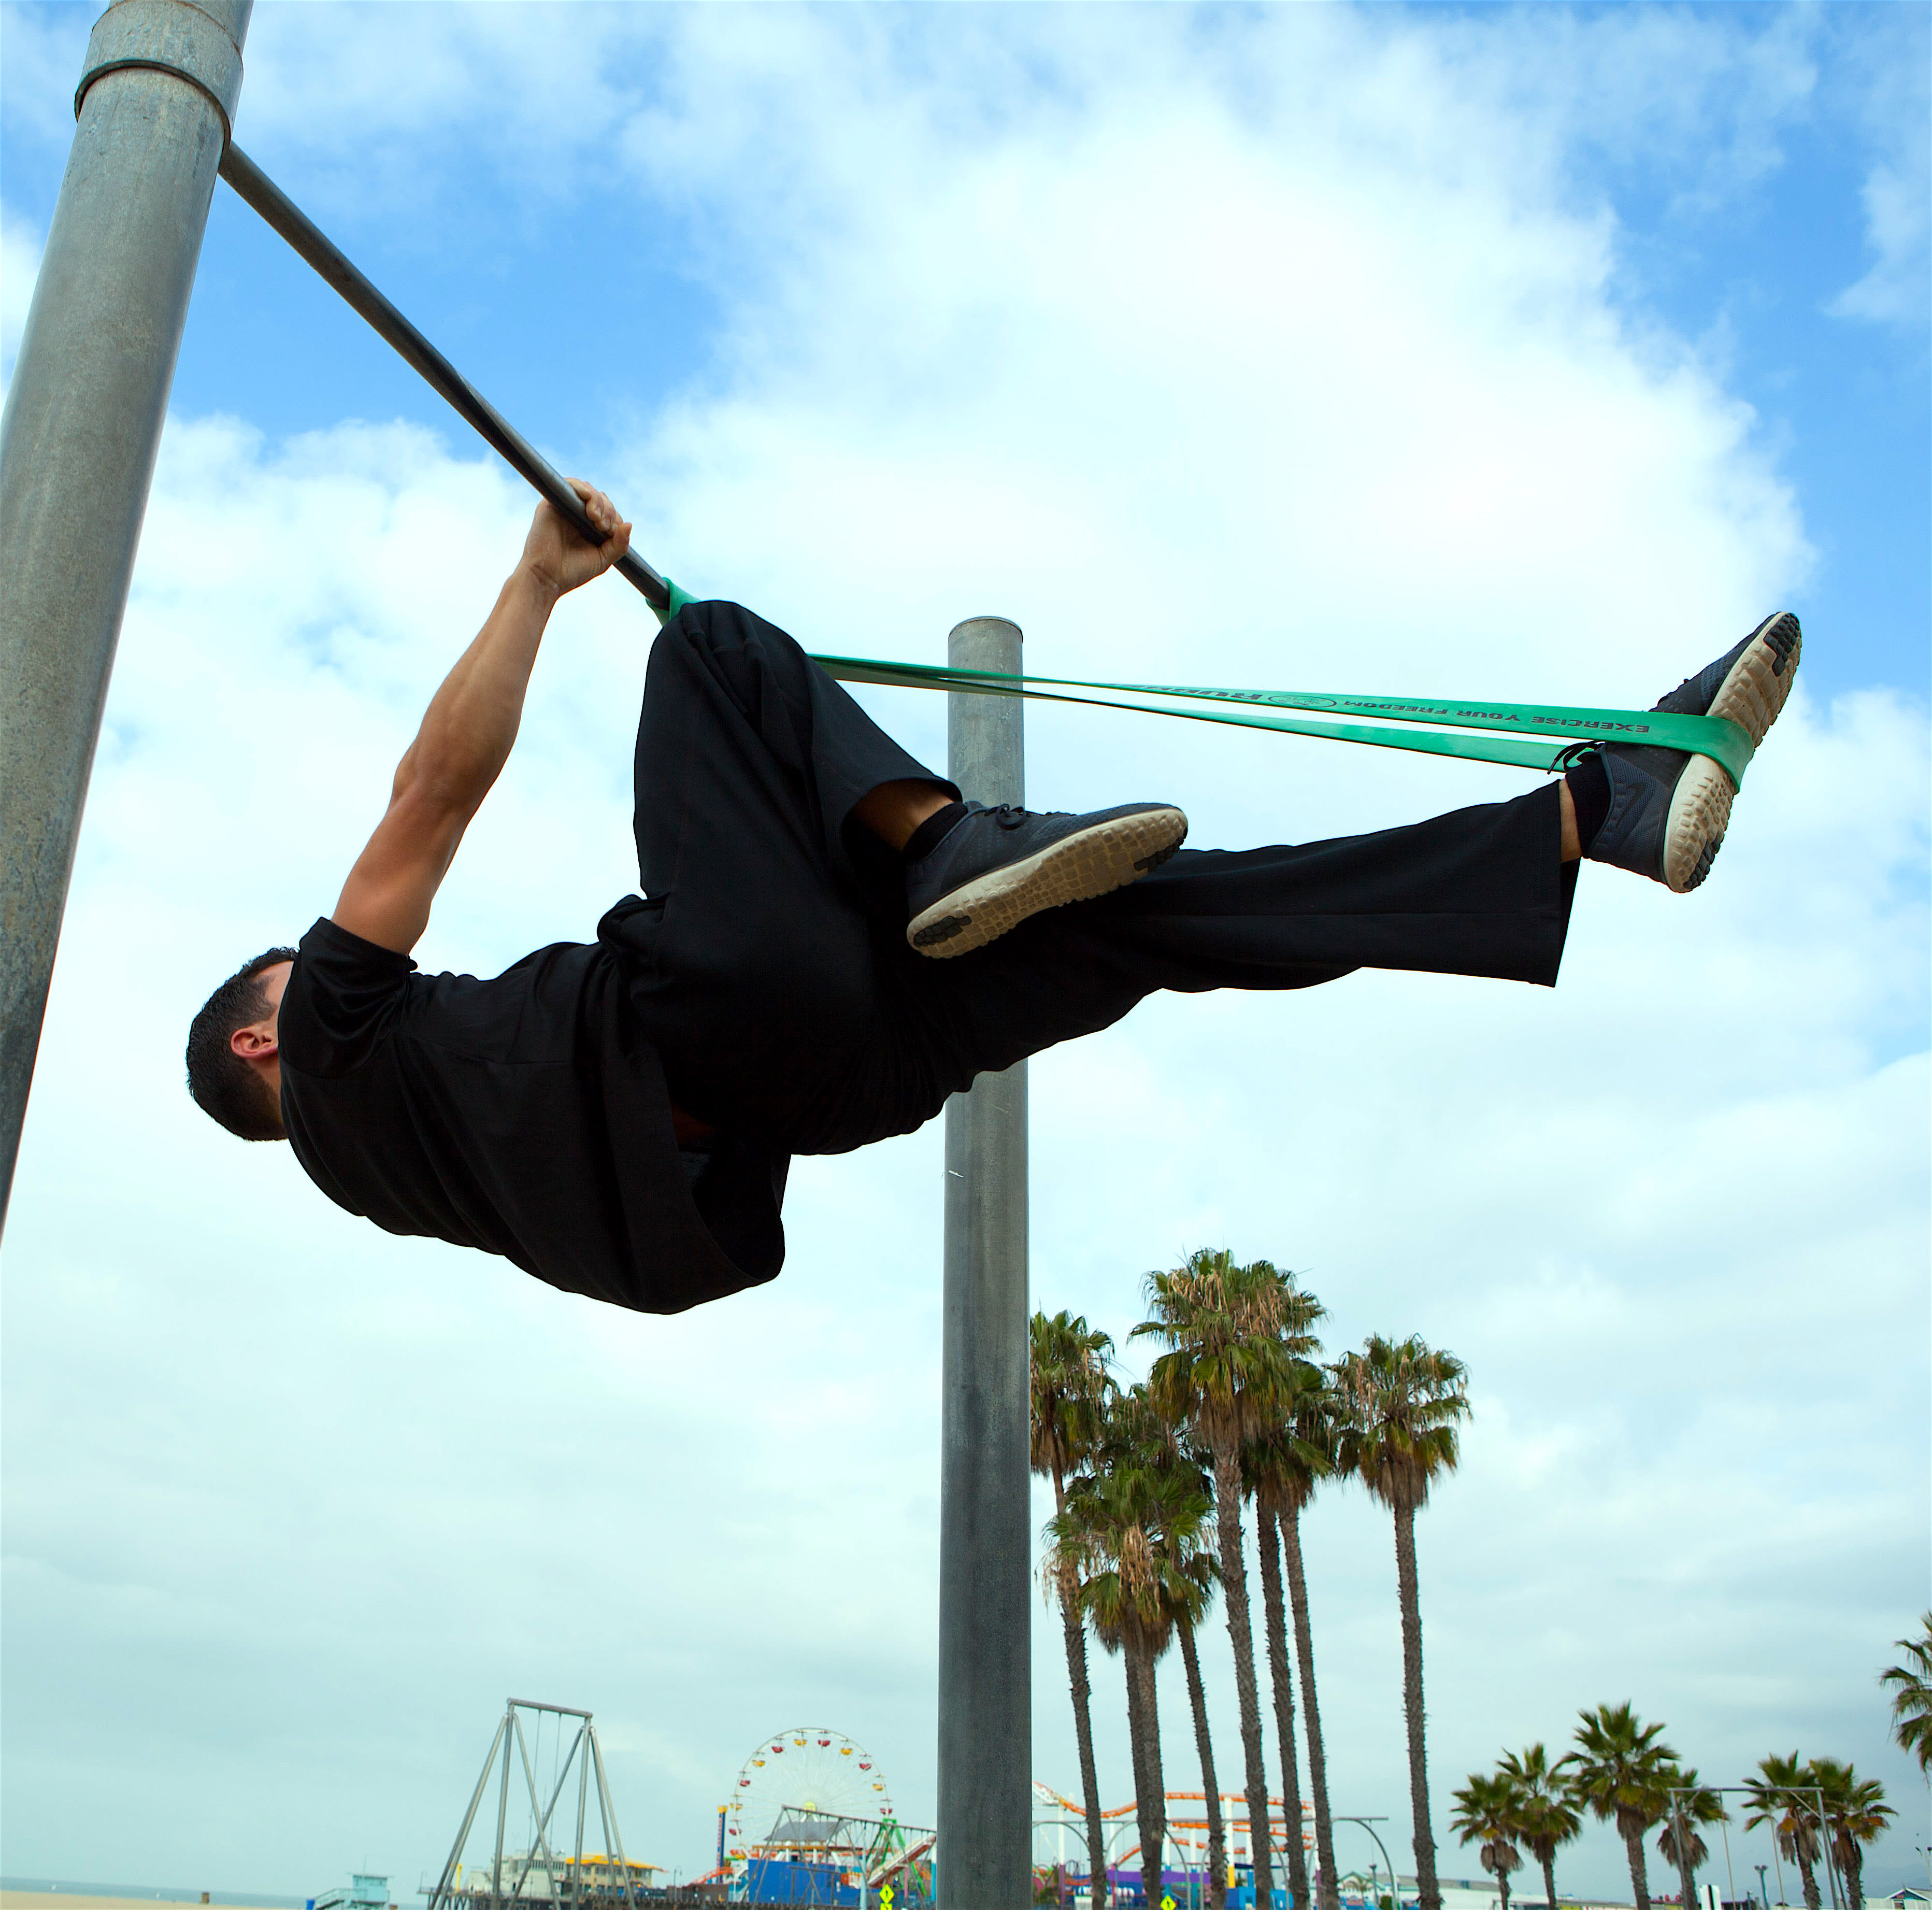
3.) The next progression is the Single Leg Front Lever. From the Tuck Lever extend one leg out and while keeping your other leg bent and elevated in the ‘tuck’ position. Your whole body should be parallel to the ground during this exercise. You’ll know you are ready to advance when you can hold each leg up for 10-15 seconds. Fight to avoid bending at the waist.
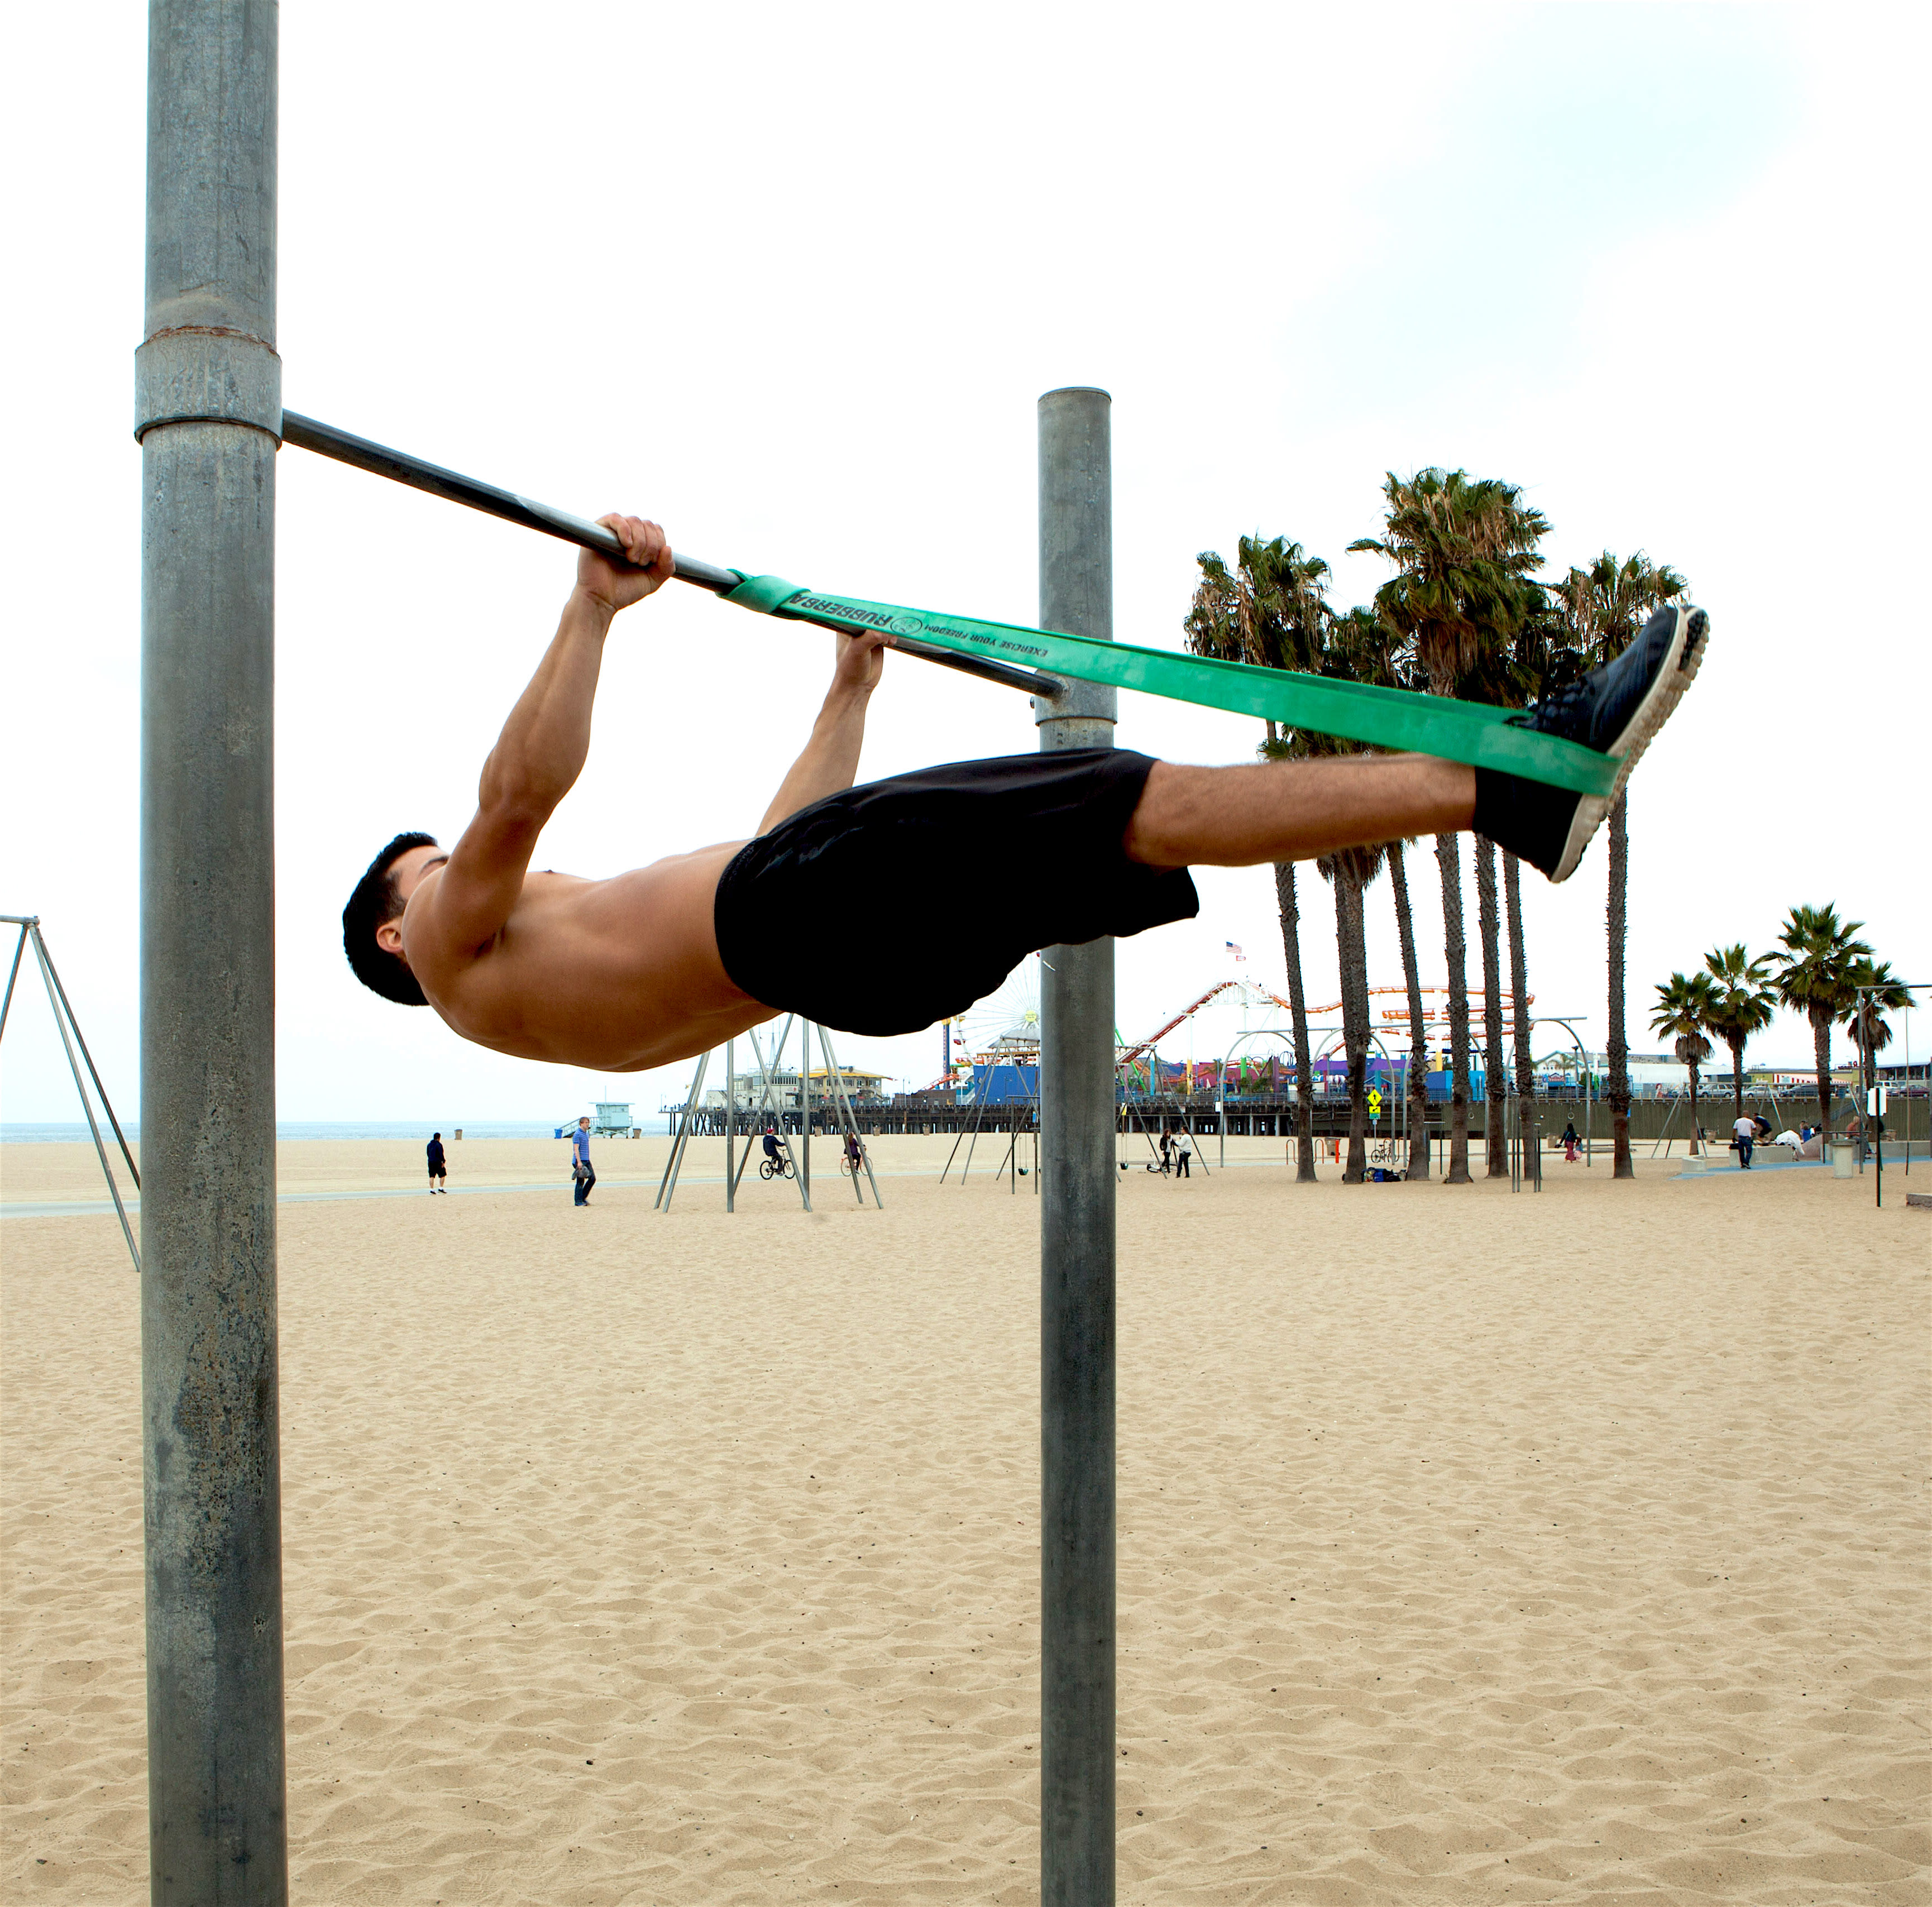
4.) To nail the Full Front Lever, you’ll now extend both legs out so your entire body is parallel to the ground. Your arms should be locked out without bending. When you get to this position make sure you point your toes forward (away from your body). Pointing your toes engages your calf muscles, which offers the sensation of pushing out the other direction and places less strain on your upper body. Once you’re able to reach this position its time to give yourself a pat on the back and keep working to hold it longer.
When you are able to hold a front lever for several seconds there are a couple ways techniques to train for strength gains:
The first way is straightforward. Try rising straight into a front lever hold without going through the tuck progressions first. This requires a great deal of core and lat strength to hoist yourself up into place.
The second way is to use negatives. Negatives are when you lower yourself into the front lever instead of raising up into it. First, raise your legs up into a ‘candlestick position’ which is when your body is perpendicular to the ground with your legs pointing straight upward. Your knees should be above the bar with your head pointing down towards the ground. Now you need to lower your legs slowly, while keeping your body perfectly straight, in the front lever hold. If you can’t hold it at first that’s totally fine, try to focus on being able to come down gracefully from the candlestick as slow and controlled as you can.
Doing several reps of the front lever is crucial for building muscular endurance. Within each progression stage, you should be performing multiple reps, which forces your body to develop the strength needed to move on to the next progression. We recommend doing at least 10 sets of 10 reps of front lever [or tuck lever] holds with [ideally] a 10 second hold time for each rep during your workout, and include this 2-4 times per week.
Practice makes better. The front lever can’t be neglected in your workouts if you want to see gradual improvements. Try to increase your overall hold times and keep track with every lever so you can chart your progress. Train hard and train consistently and you’ll be a full front lever cranking machine in no time. Pick up a set of our bodyweight training calisthenics bands. We have a full line of portable training calisthenics equipment that you can pop in your backpack and take anywhere. Good luck!
P.S. If you want to know who that stud is in the photos, go find @muscle_up_jarvis on Instagram. He's a local legend here in Santa Monica. Here are some additional quick and dirty training tips on how to do a front lever on the bar.


